46 KiB
- title
-
Project Creator's Guide
Project Creator's Guide
Before You Start
This is a long document. It's long because it has to be, not because we want it to be. If you follow it, everything will be fine.
It is important that you perform all of the steps, in the order they are given here. Don't skip any steps. Don't try to do things in parallel. Don't jump around.
If your project is already set up in the OpenStack CI infrastructure,
you might want to see zuul_best_practices for information on adding new
tests to a repository.
Decide Status of your Project
The OpenStack CI infrastructure can be used both by official OpenStack projects and also by OpenStack-related projects.
Official projects are those that have applied for this status with the technical committee. The governance site contains details on how to become one and the list of current OpenStack Project Teams. The Project Team Guide explains how OpenStack project teams work.
If you add a new repository, you can make it part of an existing official OpenStack project, use it to start a new official project, or start as a related project, also known as a StackForge project.
Note that only official OpenStack projects may use certain parts of the OpenStack infrastructure, especially the docs.openstack.org and specs.openstack.org server.
Choosing a Good Name for Your Project
It is important to choose a descriptive name that does not conflict with other projects. There are several places you'll need to look to ensure uniqueness and suitability of the name.
Note
If you encounter any issues establishing a valid unique name across all of the tools we use, consult with the Release Manager before going any further.
Character Set
We prefer to use names made up of lower case ASCII letters and the
- punctuation symbol to avoid issues with various
installation tools.
git repository
The base name of the repository should be unique across all of the
namespace directories for git repositories under https://git.openstack.org/cgit.
That is, it is not sufficient to have openstack/foo and
openstack-dev/foo because that prevents us from moving
those two repositories into the same namespace at some point.
Launchpad
It is preferred but not absolutely necessary for your project name on https://launchpad.net to be the same as your git repository name. Try "python-" as a prefix if necessary (for example, "python-stevedore").
PyPI
Python packages need to have a unique name on the Python Package Index (https://pypi.python.org) so we can publish source distributions to be installed via pip.
It is best to name the repository and the top level Python package the same when possible so that the name used to install the dist and the name used to import the package in source files match. Try "python-" as a prefix if necessary (for example, "python-stevedore").
Project Team Rules
Some OpenStack project teams have naming conventions that must be followed. For example, the Oslo team has instructions for choosing a name for new Oslo libraries.
Set up Launchpad
OpenStack uses https://launchpad.net for project management tasks such as release planning and bug tracking. The first step to importing your project is to make sure you have the right project management tools configured.
Create a new Launchpad Project
- Visit https://launchpad.net/projects/+new and fill in the details.
- Name your project using the same name you plan to use for the git repository, unless that is taken. Try "python-" as a prefix if necessary (for example, "python-stevedore"). If that name is also taken, consult with the Release Manager before going any further.
Put Your New Project in the Correct Project Group
If your project is not an official OpenStack project, this step is optional.
- From the Overview page of your project, select "Change Details" from the right sidebar (https://launchpad.net/<projectname>/+edit).
- Find the "Part of" field and set the value to "openstack" for integrated projects and "oslo" for Oslo libraries.
- Save your changes.
Create Bug Tracker
From the Overview page for your project, click the "Bugs" link at the top of the page.
Click the pencil "edit" icon next to "Configure Bugs".
Choose "In launchpad".
Check the box labeled "Expire 'Incomplete' bug reports when they become inactive"
Check the box labeled "Search for possible duplicate bugs when a new bug is filed"
Set the "Bug supervisor" field to "<projectname>-bugs" (for example, "oslo-bugs").
Note
You may need to create the bug management team in Launchpad. If you do so, set the owner of the team to the "OpenStack Administrators team" called "openstack-admins" and add the "hudson-openstack" user to the team.
Save your changes.
Create Blueprint Tracker
If your project uses Launchpad blueprints to track new feature work, you should set up the blueprint tracker now. Otherwise, skip this step.
- From the Overview page for your project, click the "Blueprints" link at the top of the page.
- Click the pencil "edit" icon next to "Configure Blueprints".
- Choose "Launchpad".
- Save your changes.
Set up Supervisors for your Project
From the Overview page for your project, click the pencil "edit" icon next to the Maintainer field. Replace your name with the <projectname>-drivers team (for example, "oslo-drivers").
Note
You may need to create the drivers team. If you do, set the owner of the team to 'openstack-admins'.
From the Overview page for your project, click the pencil "edit" icon next to the Drivers field. Replace your name with the project drivers team.
Note
If either of these steps makes it so you cannot edit the project, stop and ask someone in the drivers group to help you before proceeding.
Give OpenStack Permission to Publish Releases
New packages without any releases need to be manually registered on PyPI.
If you do not have PyPI credentials, you should create them at https://pypi.python.org/pypi?%3Aaction=register_form as they are required for the next step.
Once you have PyPI credentials see https://packaging.python.org/tutorials/distributing-packages/
to create and upload your initial package. The initial package should
contain a PKG-INFO file for a nonexistent version
0 of your package (that way any release you make is
guaranteed to be higher). It can be as simple as a plain text file
containing the following two lines (where packagename is
replaced by the desired package name):
Name: packagename
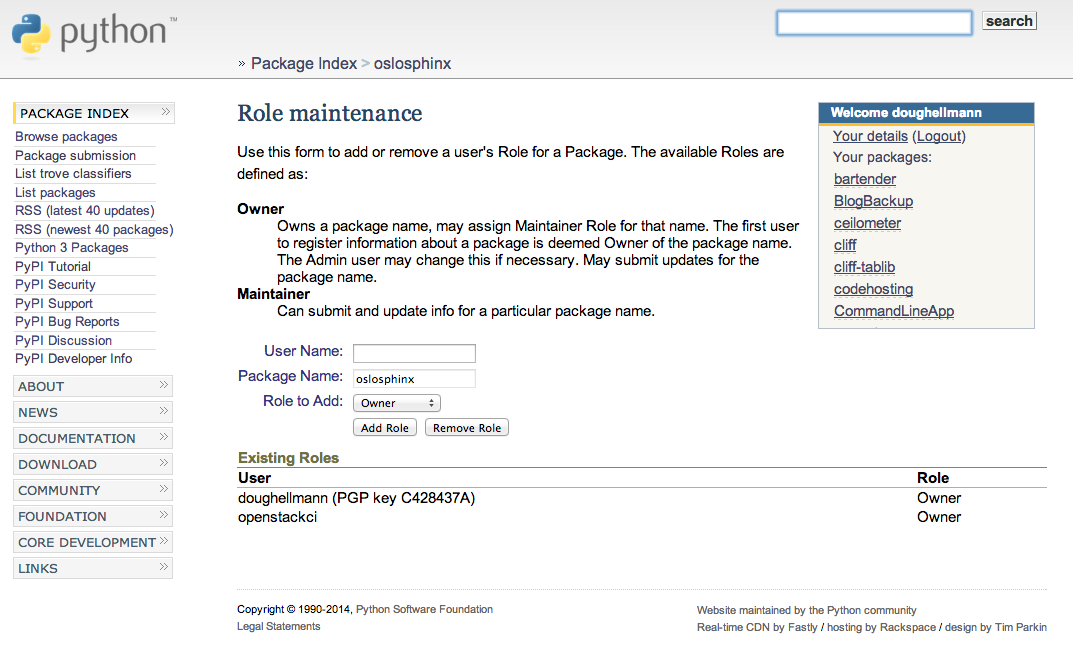
Version: 0Next your package needs to be updated so the "openstackci" user has "Owner" permissions.
Visit
https://pypi.python.org/pypi?:action=role_form&package_name=<packagename>
and add "openstackci" in the "User Name" field, set the role to "Owner",
and click "Add Role".
Adding the Project to the CI System
To add a project to the CI System, you need to modify some infrastructure configuration files using git and the OpenStack gerrit review server.
All of the changes described in this section should be submitted
together as one patchset to the
openstack-infra/project-config repository.
Add the project to the master projects list
Edit
gerrit/projects.yamlto add a new section like:- project: openstack/<projectname> description: Latest and greatest cloud stuff.Note: All projects should use the
openstack/namespace regardless of whether they are or intend to become official OpenStack projects.Provide a very brief description of the library.
If you have an existing repository that you want to import (for example, when graduating an Oslo library or bringing a repository into gerrit from github), set the "upstream" field to the URL of the publicly reachable repository and also read the information in
setup_review:- project: openstack/<projectname> description: Latest and greatest cloud stuff. upstream: https://github.com/awesumsauce/<projectname>.gitNote
If you do not configure the upstream source here and get the project imported at project creation time you will have to push existing history into Gerrit and "review" then approve it or push some squashed set of history and "review" then approve that. If you need to preserve history the best option is to configure the upstream properly for Gerrit project creation. If you have a lot of history to import, please use the upstream field instead of creating a repository and then pushing the patches one at a time. Pushing a large number of related patches all at one time causes the CI infrastructure to slow down, which impacts work on all of the other projects using it.
Note
If the git repository short name does not match the Launchpad project name, you need to add a "groups" list to provide the mapping. The groups list is also used by Storyboard to be able to present grouped views of stories and tasks across multiple related repositories.
For example, Oslo repositories should use "oslo" to ensure that they are associated with the https://launchpad.net/oslo project group for tracking bugs and milestones:
- project: openstack/<projectname> description: Latest and greatest cloud stuff. upstream: https://github.com/awesumsauce/<projectname>.git groups: - oslo
Add Gerrit permissions
Each project should have a gerrit group "<projectname>-core", containing the normal core group, with permission to +2 changes.
Libraries for official projects should be configured so the
library-release team has tagging rights.
Other official projects should be configured so that tagging rights
use the default settings, allowing the "Release Managers"
team to push tags.
For unofficial projects, a second "<projectname>-release" team should be created and populated with a small group of the primary maintainers with permission to push tags to trigger releases.
Create a
gerrit/acls/openstack/<projectname>.config as
explained in the following sections.
Note
If the git repository you are creating is using the same gerrit permissions - including core groups - as another repository, do not copy the configuration file, instead reference it.
To do this make an additional change to the
gerrit/projects.yaml file as shown here:
- project: openstack/<projectname>
  description: Latest and greatest cloud stuff.
  acl-config: /home/gerrit2/acls/openstack/other-project.config
Minimal ACL file
The minimal ACL file allows working only on master and requires a change-ID for each change:
[access "refs/heads/*"]
abandon = group <projectname>-core
label-Code-Review = -2..+2 group <projectname>-core
label-Workflow = -1..+1 group <projectname>-core

[receive]
requireChangeId = true

[submit]
mergeContent = true
Request Signing of ICLA
If your project requires signing of the Individual Contributor
License Agreement (ICLA), change
the receive section to:
[receive]
requireChangeId = true
requireContributorAgreement = true
Note that this is mandatory for all official OpenStack projects and should also be set for projects that want to become official.
Creation of Tags
For library projects managed by the release team, allow the
library-release team to create tags by adding a new section
containing:
[access "refs/tags/*"]
pushSignedTag = group library-release
For non-library projects, or unofficial projects, you can allow the project-specific release team to create tags by adding a new section containing:
[access "refs/tags/*"]
pushSignedTag = group <projectname>-release
Note the ACL file enforces strict alphabetical ordering of sections,
so access sections like heads and tags must go in order and
before the receive section.
Deletion of Tags
Tags should be created with care and treated as if they cannot be deleted.
While deletion of tags can be done at the source and replicated to the git mirrors, deletion of tags is not propagated to existing git pulls of the repo. This means anyone who has done a remote update, including systems in the OpenStack infrastructure which fire on tags, will have that tag indefinitely.
Creation of Branches
To allow creation of branches to the release team, add a
create rule to it the refs/heads/*
section:
[access "refs/heads/*"]
abandon = group <projectname>-core
create = group <projectname>-release
label-Code-Review = -2..+2 group <projectname>-core
label-Workflow = -1..+1 group <projectname>-core
Deletion of Branches
Members of a team that can create branches do not have access to delete branches. Instead, someone on the infrastructure team with gerrit administrator privileges will need to complete this request.
Stable Maintenance Team
If your team has a separate team to review stable branches, add a
refs/heads/stable/* section:
[access "refs/heads/stable/*"]
abandon = group Change Owner
abandon = group Project Bootstrappers
abandon = group <projectname>-stable-maint
exclusiveGroupPermissions = abandon label-Code-Review label-Workflow
label-Code-Review = -2..+2 group Project Bootstrappers
label-Code-Review = -2..+2 group <project-name>-stable-maint
label-Code-Review = -1..+1 group Registered Users
label-Workflow = -1..+0 group Change Owner
label-Workflow = -1..+1 group Project Bootstrappers
label-Workflow = -1..+1 group <project-name>-stable-maint
The exclusiveGroupPermissions avoids the inheritance
from refs/heads/* and the default setup. The other lines
grant the privileges to the stable team and add back the default
privileges for owners of a change, gerrit administrators, and all
users.
Voting Third-Party CI
To allow some third-party CI systems to vote Verify +1 or -1 on
proposed changes for your project, add a label-Verified
rule to the refs/heads/* section:
[access "refs/heads/*"]
abandon = group <projectname>-core
label-Code-Review = -2..+2 group <projectname>-core
label-Verified = -1..+1 group <projectname>-ci
label-Workflow = -1..+1 group <projectname>-core
Optionally, if you only want them to be able to Verify +1 you can
adjust the vote range to 0..+1 instead.
Once the project is created it is strongly recommended you go to the
General settings for the <projectname>-ci
group in Gerrit's WebUI and switch the Owners field to your
<projectname>-core group (or
<projectname>-release if you have one) so that it is
no longer self-managed, allowing your project team to control the
membership without needing to be members of the group themselves.
Extended ACL File
So, if your project requires the ICLA signed, has a release team that
will create tags and branches, and allow voting third-party CI systems,
create a gerrit/acls/openstack/<projectname>.config
like:
[access "refs/heads/*"]
abandon = group <projectname>-core
create = group <projectname>-release
label-Code-Review = -2..+2 group <projectname>-core
label-Verified = -1..+1 group <projectname>-ci
label-Workflow = -1..+1 group <projectname>-core

[access "refs/tags/*"]
pushSignedTag = group <projectname>-release

[receive]
requireChangeId = true
requireContributorAgreement = true

[submit]
mergeContent = true
See other files in the same directory for further examples.
Configure GerritBot to Announce Changes
If you want changes proposed and merged to your project to be
announced on IRC, edit gerritbot/channels.yaml to add your
new project to the list of projects. For example, to announce changes
related to an Oslo library in the #openstack-oslo channel,
add it to the openstack-oslo section:
openstack-oslo:
  events:
    - patchset-created
    - x-vrif-minus-2
  projects:
    - openstack/cliff
    - openstack/oslo.config
    - openstack/oslo-incubator
    - openstack/oslo.messaging
    - openstack/oslo.rootwrap
    - openstack/oslosphinx
    - openstack/oslo-specs
    - openstack/oslo.test
    - openstack/oslo.version
    - openstack/oslo.vmware
    - openstack/stevedore
    - openstack/taskflow
    - openstack-dev/cookiecutter
    - openstack-dev/hacking
    - openstack-dev/oslo-cookiecutter
    - openstack-dev/pbr
  branches:
    - master
If you're adding a new IRC channel, see the IRC services documentation.
Add Project to Zuul
Test jobs are run by Zuul. For a discussion of how Zuul jobs work in
an OpenStack context, please see zuulv3.
Edit zuul/main.yaml and add your project in alphabetical
order to the untrusted-projects section in the
openstack tenant after the comment that reads:
# After this point, sorting projects alphabetically will help
# merge conflicts
Submitting Infra Change for Review
At this point, you should submit all the changes discussed so far as a single patchset to gerrit.
When submitting the change to openstack-infra/project-config for review, use the "new-project" topic so it receives the appropriate attention:
$ git review -t new-projectHold onto the Change-Id for this patch. You will need to include it
in the commit message when you add-to-governance-repo later.
Add Jobs for your Project
Every project needs at least one test job or patches will not be able to land.
Note
The patchset described in this section must be submitted separately from the change described above, and it will fail initially. That's to be expected. Read through the entire following section, including the Important Note at the end, before submitting your change to gerrit.
There are a multitude of options at your disposal for test jobs, but to get started you should do the following:
Add system-required template
Every project needs to have an entry in
zuul.d/projects.yaml containing an entry for the
system-required template.
Edit zuul.d/projects.yaml and add an entry for your
project in alphabetical order:
- project:
    name: openstack/<projectname>
    templates:
      - system-required
Adding additional jobs can be done in the central repository or in
your new project's .zuul.yaml file. For more information on
addition additional jobs into your project, see in-repo-zuul-jobs.
Important
This addition of system-required template needs to be a
separate change stacked on top of the project creation one. Submit them
together. This second change will fail initially, it can only pass once
the first change merged - and then you need to add a
recheck comment.
Add New Repository to the Governance Repository
If your project is not intended to be an official OpenStack project, you may skip this step.
Each repository managed by an official OpenStack project team needs
to be listed in reference/projects.yaml in the
openstack/governance repository to indicate who owns the
repository so we know where ATCs voting rights extend.
Find the appropriate section in reference/projects.yaml
and add the new repository to the list. For example, to add a new Oslo
library edit the "Oslo" section:
Oslo:
  ptl: Doug Hellmann (dhellmann)
  service: Common libraries
  mission:
    To produce a set of python libraries containing code shared by OpenStack
    projects. The APIs provided by these libraries should be high quality,
    stable, consistent, documented and generally applicable.
  url: https://wiki.openstack.org/wiki/Oslo
  tags:
    - name: team:diverse-affiliation
  projects:
    - repo: openstack/oslo-incubator
      tags:
        - name: release:has-stable-branches
    - repo: openstack/oslo.config
      tags:
        - name: release:independent
        - name: release:has-stable-branches
    - repo: openstack/oslo.messaging
      tags:
        - name: release:independent
        - name: release:has-stable-branches
    - repo: openstack/oslo.rootwrap
      tags:
        - name: release:independent
        - name: release:has-stable-branches
    - repo: openstack/oslosphinx
      tags:
        - name: release:independent
        - name: release:has-stable-branches
    - repo: openstack-dev/cookiecutter
    - repo: openstack-dev/pbr
      tags:
        - name: release:independent
You can check which tags to use, or the meaning of any tag, by consulting the list of currently allowed tags.
When writing the commit message for this change, make this change depend on the project creation change by including a link to its Change-ID (from the previous step):
Depends-On: <Gerrit Change-Id of project-config change>Then, go back to the project-config change and add a link to the Change-ID of the governance change in the project-config commit message:
Needed-By: <Gerrit Change-Id of governance change>so that reviewers know that the governance change has been created.
However, if you are creating an entirely new OpenStack project team
(i.e., adding a new top-level entry into
reference/projects.yaml), you should reverse the dependency
direction (the project creation change should depend on the governance
change because the TC needs to approve the new project team application
first).
Wait Here
The rest of the process needs this initial import to finish, so coordinate with the Infra team, and read ahead, but don't do any of these other steps until the import is complete and the new repository is configured.
The Infra team can be contacted via IRC on Freenode in the #openstack-infra channel or via email to the openstack-infra mail list.
Update the Gerrit Group Members
After the review is approved and groups are created ask the Infra team to add you to both groups in Gerrit, and then you can add other members by going to https://review.openstack.org/#/admin/groups/ and filtering for your group's names.
The project team lead (PTL), at least, should be added to "<projectname>-release", and other developers who understand the release process can volunteer to be added as well.
Note
These Gerrit groups are self-managed. This means that any member of the group is able to add or remove other members. Consider this fact carefully when deciding to add others to a group, as you need to trust them all to collaborate on group management with you.
Updating devstack-vm-gate-wrap.sh
The devstack-gate tools let us install OpenStack
projects in a consistent way so they can all be tested with a common
configuration. If your project will not need to be installed for
devstack gate jobs, you can skip this step.
Check out openstack-infra/devstack-gate and edit
devstack-vm-gate-wrap.sh to add the new project:
PROJECTS="openstack/<projectname> $PROJECTS"Keep the list in alphabetical order.
Add Project to the Requirements List
The global requirements repository (openstack/requirements) controls which dependencies can be added to a project to ensure that all of OpenStack can be installed together on a single system without conflicts. It also automatically contributes updates to the requirements lists for OpenStack projects when the global requirements change.
If your project is not going to participate in this requirements management, you can skip this step.
Edit the projects.txt file to add the new library,
adding "openstack/<projectname>" in the appropriate place in
alphabetical order.
Preparing a New Git Repository using cookiecutter
All OpenStack projects should use one of our cookiecutter templates for creating an initial repository to hold the source code.
If you had an existing repository ready for import when you submitted the change to project-config, you can skip this section.
Start by checking out a copy of your new repository:
$ git clone https://git.openstack.org/openstack/<projectname>$ pip install cookiecutterChoosing the Right cookiecutter Template
The template in openstack-dev/cookiecutter is suitable
for most projects.
Note
Cookiecutter with '-f' option overwrites the contents of the <projectname> directory. Be careful when working with non-empty projects, it will overwrite any files you have which match names in the cookiecutter repository.
Remember, as mentioned earlier, these commands should typically be used only if you are working with an empty repository.
$ cookiecutter -f https://git.openstack.org/openstack-dev/cookiecutterThe template in openstack-dev/oslo-cookiecutter should
be used for Oslo libraries.
$ cookiecutter -f https://git.openstack.org/openstack-dev/oslo-cookiecutterThe template in openstack/ui-cookiecutter should be used
for Horizon plugins.
$ cookiecutter https://git.openstack.org/openstack/ui-cookiecutterApplying the Template
Running cookiecutter will prompt you for several settings, based on the template's configuration. It will then update your project with a skeleton, ready to have your other files added.
$ cd <projectname>
$ git review
Adding In-Repo Zuul Jobs
Every project needs test jobs.
OpenStack has a number of jobs and project-templates that can be used directly in your project's Zuul config. You can also make new jobs that inherit from existing jobs or or you can write your own from scratch.
To get yourself started with a completely minimal set that don't
actually do anything but do it successfully, you should add the
noop-jobs template to your project in a file called
.zuul.yaml:
- project:
    name: openstack/<projectname>
    templates:
      - noop-jobs
Once your project is up and running you'll be able to add more jobs
as you go and are ready for them. When you do, make sure to remove the
noop-jobs template, as it'll be telling Zuul to run jobs
that don't do anything, which is not needed once you have real jobs.
For more information on writing jobs for Zuul, see https://docs.openstack.org/infra/zuul/feature/zuulv3/user/config.html
and zuul_best_practices.
Verify That Gerrit and the Test Jobs are Working
The next step is to verify that you can submit a change request for the project, have it pass the test jobs, approve it, and then have it merge.
Configure git review
If the new project you have added has a specified upstream you will
need to add a .gitreview file to the repository once it has
been created. This new file will allow you to use
git review.
The basic process is clone your new repository, add file, push to Gerrit, review and approve:
$ git clone https://git.openstack.org/openstack/<projectname>
$ cd <projectname>
$ git checkout -b add-gitreview
$ cat > .gitreview <<EOF
[gerrit]
host=review.openstack.org
port=29418
project=openstack/<projectname>.git
EOF
$ git review -s
$ git add .gitreview
$ git commit -m 'Add .gitreview file'
$ git review
Verify that the Tests Pass
If you configure tests for an imported project, ensure that all of
the tests pass successfully before importing. Otherwise your first
change needs to fix all test failures. You can run most of the tests
locally using tox to verify that they pass.
Verify the Gerrit Review Permissions
When your project is added to gerrit, the groups defined in the ACLs
file (see add-gerrit-permissions) are created, but they are
empty by default. Someone on the infrastructure team with gerrit
administrator privileges will need to add you to each group. After that
point, you can add other members.
To check the membership of the groups, visit
https://review.openstack.org/#/admin/projects/openstack/<projectname>,access
-- for example, https://review.openstack.org/#/admin/projects/openstack-infra/infra-manual,access
-- and then click on the group names displayed on that page to review
their membership.
Prepare an Initial Release
Make Your Project Useful
Before going any farther, make the project do something useful.
If you are importing an existing project with features, you can go ahead.
If you are creating a brand new project, add some code and tests to provide some minimal functionality.
Provide Basic Developer Documentation
Update the README.rst file to include a paragraph
describing the new project.
Update the rest of the documentation under doc/source
with information about the public API, tips on adopting the tool,
instructions for running the tests, etc.
Tagging a Release
To verify that the release machinery works, push a signed tag to the "gerrit" remote. Use the smallest version number possible. If this is the first release, use "0.1.0". If other releases of the project exist, choose an appropriate next version number.
Note
You must have GnuPG installed and an OpenPGP key configured for this step.
Run:
$ git tag -s -m "descriptive message" $version
$ git push gerrit $version
Wait a little while for the pypi job to run and publish the release.
If you need to check the logs, you can use the git-os-job command:
$ git os-job $versionAllowing Other OpenStack Projects to Use Your Library
OpenStack projects share a common global requirements list so that all components can be installed together on the same system. If you are importing a new library project, you need to update that list to allow other projects to use your library.
Update the Global Requirements List
Check out the openstack/requirements git repository and
modify global-requirements.txt to:
- add the new library
- add any of the library's direct dependencies that are not already listed
Setting up Gate Testing
The devstack gate jobs install all OpenStack projects from source so that the appropriate git revisions (head, or revisions in the merge queue) are tested together. To include the new library in these tests, it needs to be included in the list of projects in the devstack gate wrapper script. For the same feature to work for developers outside of the gate, the project needs to be added to the appropriate library file of devstack.
Updating devstack
Check out
openstack-dev/devstack.Edit the appropriate project file under
libto add a variable defining where the source should go. For example, when adding a new Oslo library add it tolib/oslo:<PROJECTNAME>_DIR=$DEST/<projectname>Edit the installation function in the same file to add commands to check out the project. For example, when adding an Oslo library, change
install_osloinlib/oslo.When adding the new item, consider the installation order. Dependencies installed from source need to be processed in order so that the lower-level packages are installed first (this avoids having a library installed from a package and then re-installed from source as a dependency of something else):
function install_oslo() {
  ...
  _do_install_oslo_lib "<projectname>"
  ...
}
Edit
stackrcto add the other variables needed for configuring the new library:# new-project <PROJECTNAME>_REPO=${<PROJECTNAME>_REPO:-${GIT_BASE}/openstack/<projectname>.git} <PROJECTNAME>_BRANCH=${<PROJECTNAME>_BRANCH:-master}
Add Link to Your Developer Documentation
If your project is not an official OpenStack project, skip this section.
Update the https://docs.openstack.org/openstack-projects.html
page with a link to your documentation by checking out the
openstack/openstack-manuals repository and editing
www/developer/openstack-projects.html.
Enabling Translation Infrastructure
Once you have your project set up, you might want to enable translations. For this, you first need to mark all strings so that they can be localized, use oslo.i18n for this and follow the guidelines.
Note that this is just enabling translations, the actual translations are done by the i18n team, and they have to prioritize which projects to translate.
First enable translation in your project, depending on whether it is a Django project, a Python project or a ReactJS project.
Note
The infra scripts consider a project as a Django project when your
repository name ends with -dashboard, -ui,
horizon or django_openstack_auth. Otherwise
your project will be recognized as a Python project.
If your repository structure is more complex, for example, with
multiple python modules, or with both Django and Python projects, see
translation-setup-complex-case as well.
Python Projects
Update your setup.cfg file to include support for
translation. It should contain the compile_catalog,
update_catalog, and extract_messages sections
as well as a packages entry in the files
section:
[files]
packages = ${MODULENAME}

[compile_catalog]
directory = ${MODULENAME}/locale
domain = ${MODULENAME}

[update_catalog]
domain = ${MODULENAME}
output_dir = ${MODULENAME}/locale
input_file = ${MODULENAME}/locale/${MODULENAME}.pot

[extract_messages]
keywords = _ gettext ngettext l_ lazy_gettext
mapping_file = babel.cfg
output_file = ${MODULENAME}/locale/${MODULENAME}.pot
Replace ${MODULENAME} with the name of your main module
like nova or novaclient. Your i18n setup file,
normally named _i18n.py, should use the name of your module
as domain name:
_translators = oslo_i18n.TranslatorFactory(domain='${MODULENAME}')Django Projects
Update your setup.cfg file. It should contain a
packages entry in the files section:
[files]
packages = ${MODULENAME}
Create file babel-django.cfg with the following
content:
[extractors]
django = django_babel.extract:extract_django

[python: **.py]
[django: templates/**.html]
[django: **/templates/**.csv]
Create file babel-djangojs.cfg with the following
content:
[extractors]
# We use a custom extractor to find translatable strings in AngularJS
# templates. The extractor is included in horizon.utils for now.
# See http://babel.pocoo.org/docs/messages/#referencing-extraction-methods for
# details on how this works.
angular = horizon.utils.babel_extract_angular:extract_angular

[javascript: **.js]

# We need to look into all static folders for HTML files.
# The **/static ensures that we also search within
# .../dashboards/XYZ/static which will ensure
# that plugins are also translated.
[angular: **/static/**.html]
ReactJS Projects
Three new dependencies are required : react-intl,
babel-plugin-react-intl, and
react-intl-po.
Update your package.json file. It should contain
references to the json2pot and po2json
commands.
"scripts": {
    ...
    "json2pot": "rip json2pot ./i18n/extracted-messages/**/*.json -o ./i18n/messages.pot",
    "po2json": "rip po2json -m ./i18n/extracted-messages/**/*.json"
    }
The translated PO files will converted into JSON and placed into the
./i18n/locales directory.
Add Translation Server Support
Propose a change to the openstack-infra/project-config
repository including the following changes:
Set up the project on the translation server.
Edit file
gerrit/projects.yamland add thetranslateoption:- project: openstack/<projectname> description: Latest and greatest cloud stuff. options: - translateAdd the jobs to your pipelines.
Edit file
zuul.d/projects.yamland add thetranslation-jobstemplate to your repository:- project: name: openstack/<projectname> templates: - system-required - translation-jobs
When submitting the change to
openstack-infra/project-config for review, use the
translation_setup topic so it receives the appropriate
attention:
$ git review -t translation_setupWith these changes merged, the strings marked for translation are sent to the translation server after each merge to your project. Also, a periodic job is set up that checks daily whether there are translated strings and proposes them to your project together with translation source files. Note that the daily job will only propose translated files where the majority of the strings are translated.
Checking Translation Imports
As a minimal check that the translation files that are imported are
valid, you can add to your lint target (pep8 or
linters) a simple msgfmt test:
bash -c "find ${MODULENAME} -type f -regex '.*\.pot?' -print0| \
         xargs -0 -n 1 --no-run-if-empty msgfmt --check-format -o /dev/null"
Note that the infra scripts run the same test, so adding it to your project is optional.
More complex cases
The infra scripts for translation setup work as follows:
- The infra scripts recognize a project type based on its repository
name. If the repository name ends with
-dashboard,-ui,horizonordjango_openstack_auth, it is treated as a Django project. Otherwise it is treated as a Python project. - If your repository declares multiple python modules in
packagesentry in[files]section insetup.cfg, the infra scripts run translation jobs for each python module.
We strongly recommend to follow the above guideline, but in some cases this behavior does not satisfy your project structure. For example,
- Your repository contains both Django and Python code.
- Your repository defines multiple python modules, but you just want to run the translation jobs for specific module(s).
In such cases you can declare how each python module should be
handled manually in setup.cfg. Python modules declared in
django_modules and python_modules are treated
as Django project and Python project respectively. If
django_modules or python_modules entry does
not exist, it is interpreted that there are no such modules.
[openstack_translations]
django_modules = module1
python_modules = module2 module3
You also need to setup your repository following the instruction for Python and/or Django project above appropriately.
Zuul Best Practices
There are a couple of best practices for setting up jobs.
Note that the standard OpenStack jobs should be in the
project-config repository, see what_not_to_convert.
Adding a New Job
Jobs in Zuul are self-testing, which means that the change adding a
new job can run with that job applied into the project's pipelines. It's
a good idea when adding a new job in your project to put it at least
into the check pipeline so that you can verify that it runs
as expected.
Use Templates
For many common cases, there are templates of jobs defined that can be applied to your project. For instance:
- project-template:
    name: openstack-python27-jobs
      check:
        - openstack-tox-pep8
        - openstack-tox-py27
      gate:
        - openstack-tox-pep8
        - openstack-tox-py27
To apply that to your project, add it to the templates
section:
- project:
    name: openstack/<projectname>
    templates:
      - openstack-python27-jobs
If you use the same set of tests in several repositories, introduce a new template and use that one.
Non-Voting Jobs
A job can either be voting or non-voting. If you have a job that is voting in one repository but non-voting in another, you can indicate this by using a variant.
To make a single job non-voting everywhere, add
voting: false in the job definition.
- job:
    parent: devstack
    name: <projectname>-tempest-devstack-mongodb-full
    voting: false
and add it to your project pipelines:
- project:
    name: openstack/<projectname>
    templates:
      - openstack-python-jobs
    check:
      jobs:
        - <projectname>-tempest-devstack-mongodb-full
To use a job that is otherwise voting in your project but in a
non-voting manner, add voting: false to its entry in your
project pipeline definition.
- project:
    name: openstack/<projectname>
    templates:
      - openstack-python-jobs
    check:
      jobs:
        - openstack-tox-py35:
            voting: false
Non-voting jobs should only be added to check queues. Do
not add them to the gate queue since running non-voting
jobs in the gate is just a waste of resources.
Running Jobs Only on Some Branches
If you want to run the job only on a specific stable branch, add a branch matcher to the job definition.
- job:
    parent: devstack
    name: <projectname>-tempest-devstack-mongodb-full
    voting: false
    branches: ^(?!stable/(juno|kilo)).*$
If, instead, you want to use an existing job in your project but only on a specific branch, apply it in the project pipeline definition.
- project:
    name: openstack/<projectname>
    templates:
      - openstack-python-jobs
    check:
      jobs:
        - openstack-tox-py35:
            branches: ^(?!stable/(juno|kilo)).*$
The job above will run on master but also on newer
stable branches like stable/mitaka. It will not run on the
old stable/juno and stable/kilo branches.
Project Renames
The first step of doing a rename is understanding the required governance changes needed by the rename. You can use the following criteria:
For a project being added to existing official OpenStack project:
Create an openstack/governance change and add a
"Depends-On: project-changeID" of the change you make in the following
steps to the commit message, and add a comment in the
openstack-infra/project-config change that references the
governance change. You will also make sure the PTL has expressed
approval for the addition in some way.
When preparing to rename a project, begin by making changes to the
files in the openstack-infra/project-config repository
related to your project.
When uploading your change, make sure the topic is "project-rename" which can be done by submitting the review with the following git review command:
$ git review -t project-renameMembers of the infrastructure team will review your change.
Finally, add it to the Upcoming Project Renames section of the Infrastructure Team Meeting page to make sure it's included in the next rename window.
Note
Renames have to be done during a Gerrit maintenance window scheduled by the Infrastructure team, so it may take a few weeks for your rename to be completed.
Post rename, a member of the Infrastructure team will submit a patch
to update the .gitreview file in the renamed project to point to
the new project name.
Other projects you may need to update post-rename:
- projects.txt in
openstack/requirements
Review List for New Projects
Before approving a review for a new project creation, double check the following:
- Is there existing content to import? If the team want to preserve the history, they have to use the upstream key word to import. The infra team will not push anything to your repo - and cannot hand out those permissions either.
- Will this be an official project? Then it needs a governance review, with a link to it via "Needed-By", and get PTL+1.
- Will the repo release on pypi? Check that it https://pypi.python.org is set up correctly.