3.3 KiB
User Guide
Install ScaleIO-Cinder plugin using the Installation Guide.
Create environment with enabled plugin in fuel ui, lunch the fuel site and check setting section to make sure the Scaleio-Cinder section exists
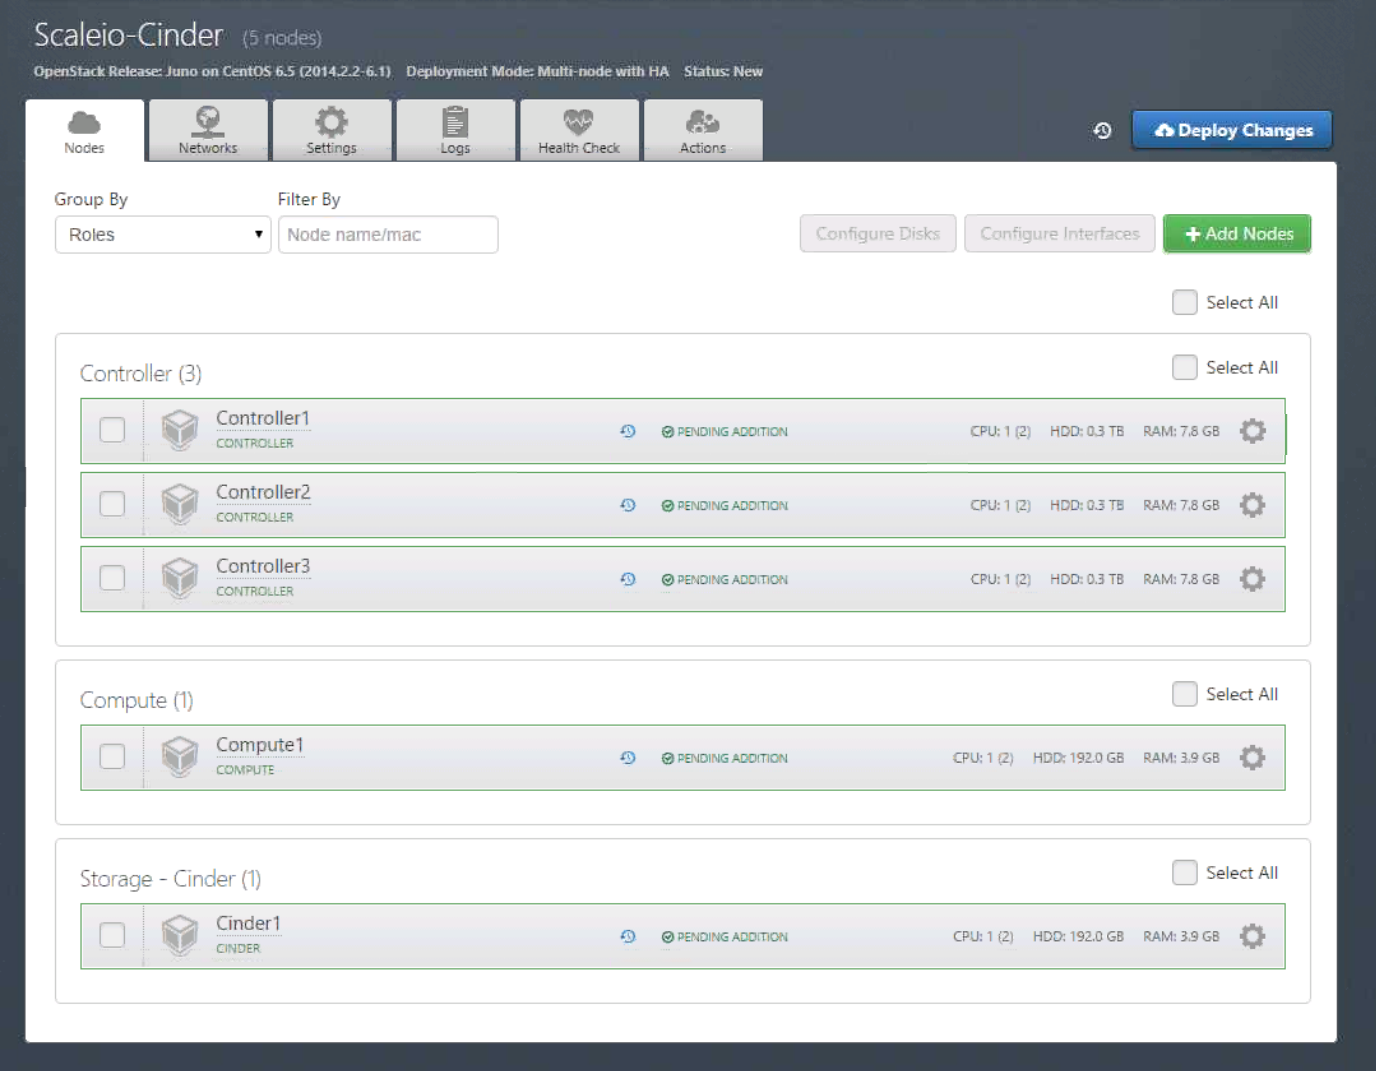
Add 3 nodes with Controller role and 1 node with Compute and another role:
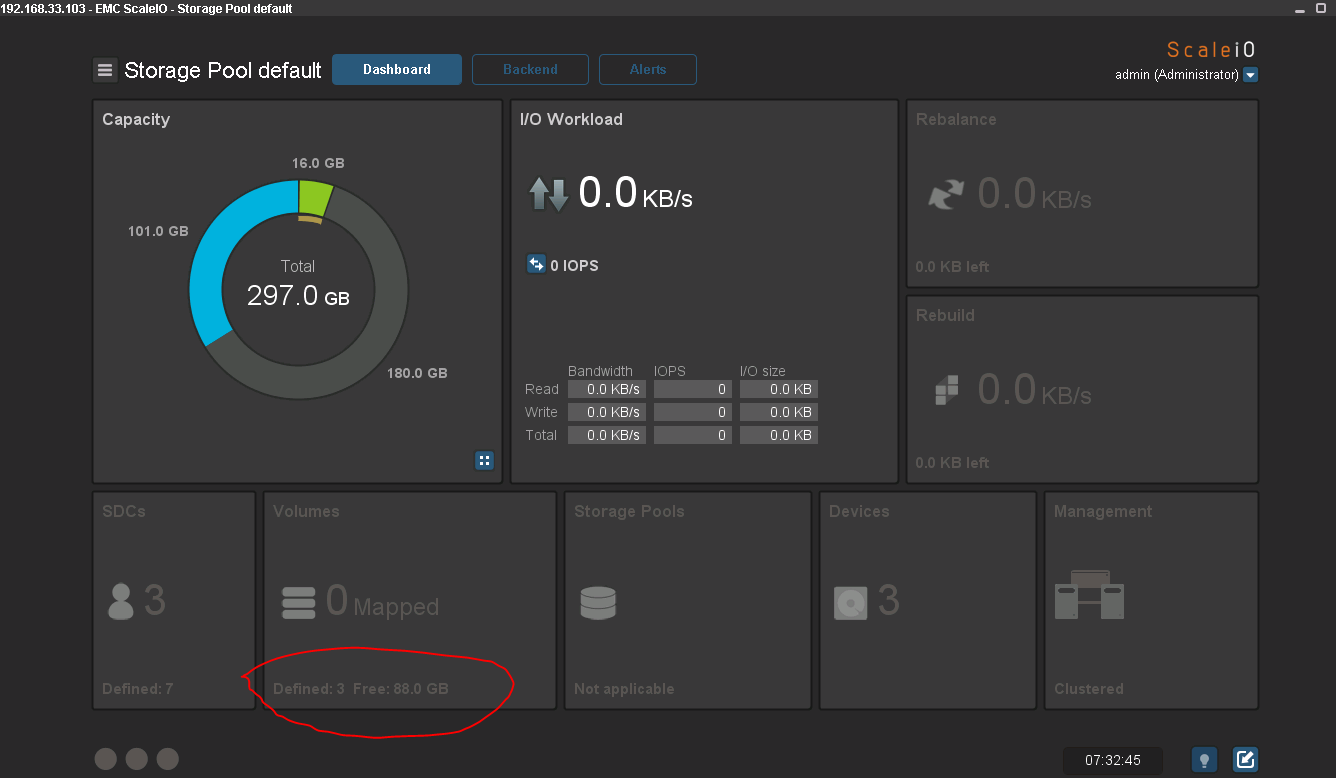
Picture of the External ScaleIO Cluster Running:
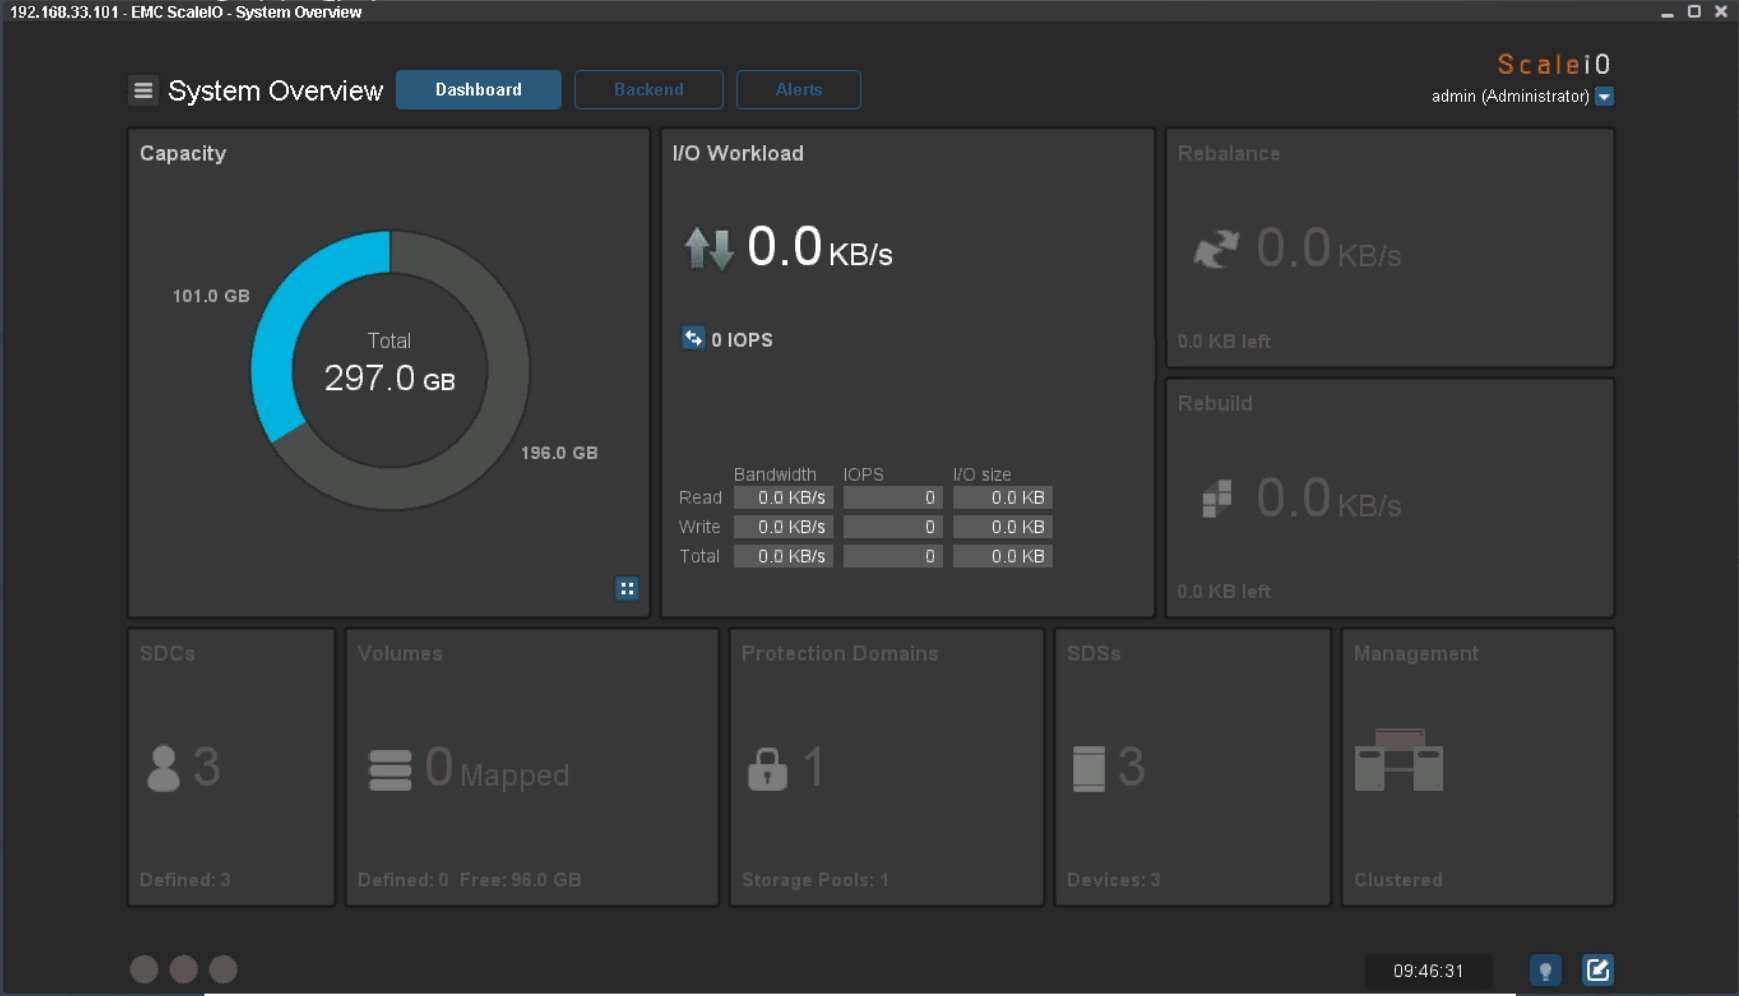
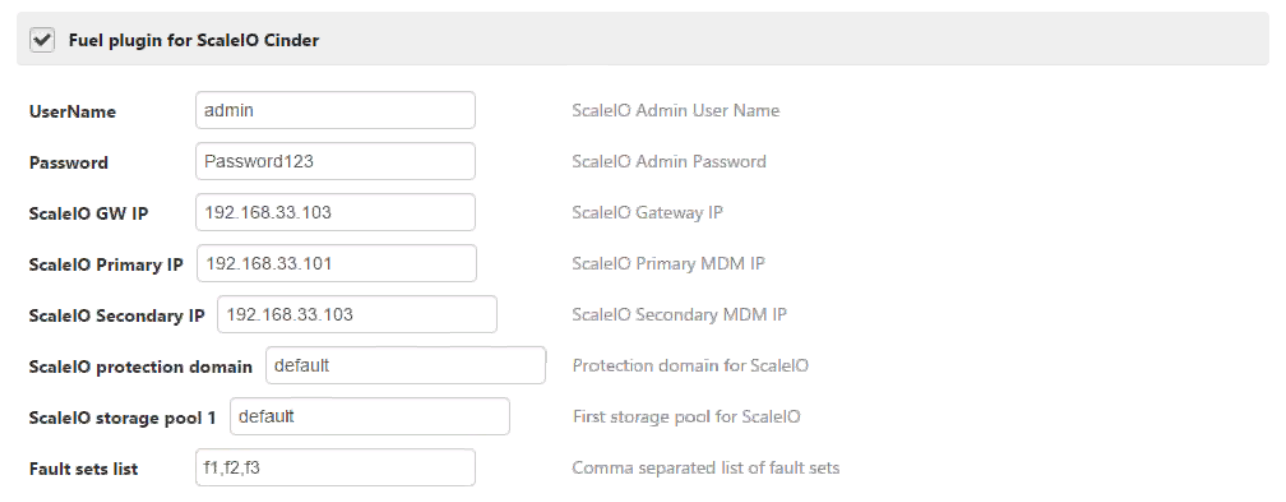
Retrive the external ScaleIO Cluster information. For our example these are the configuration settings:
Use the ScaleIO Cluster information to update the ScaleIO Plugin information:
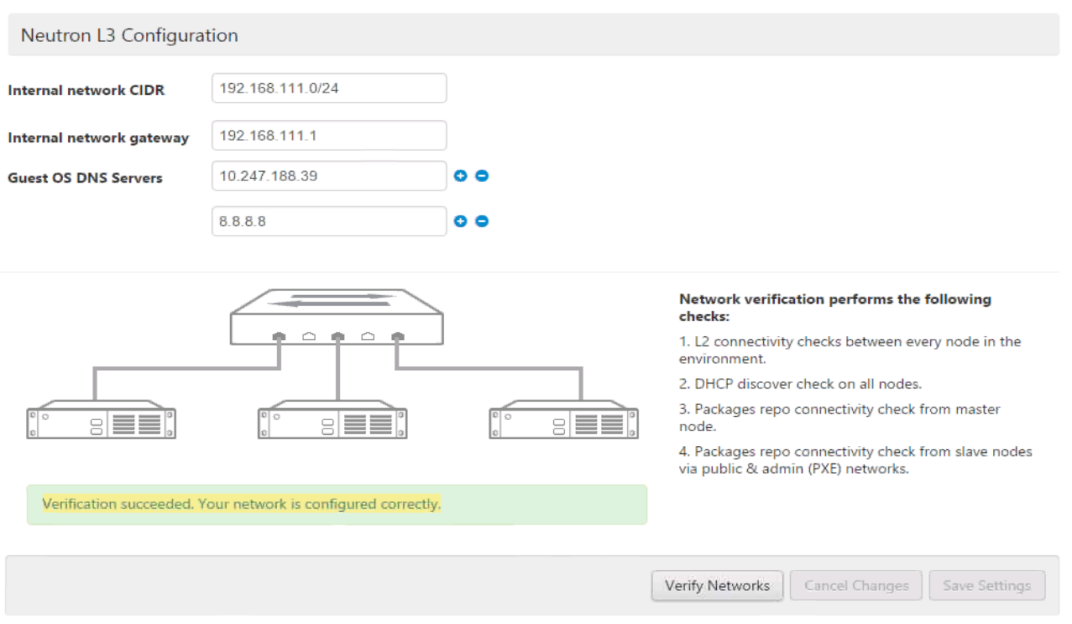
Apply network settings
Use the networking settings that are appropriate for your environment. For our example we used the default settings provided by Fuel:

Run network verification check:
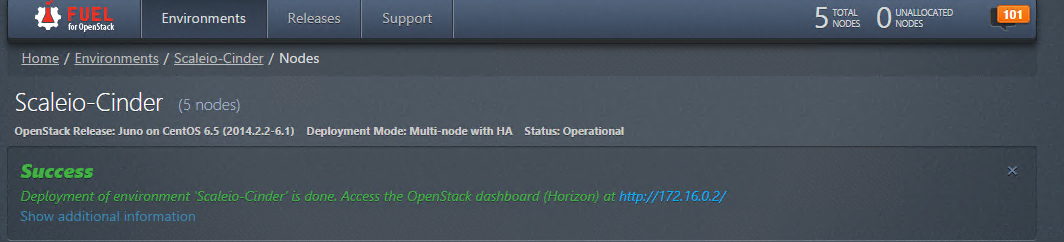
Deploy the cluster:

Once the deployment finished successfully, open OpenStack Dashboard (Horizon):
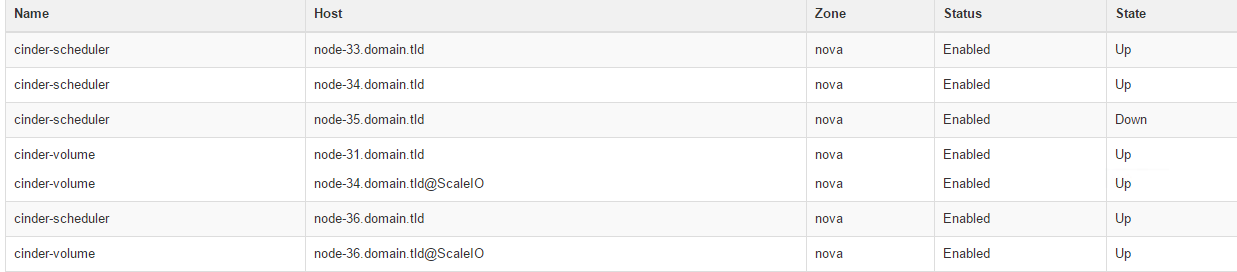
- Check Storage tab under system information and make sure ScaleIO
-
service is up and running:
ScaleIO Cinder plugin OpenStack operations
Once the OpenStack Cluster is setup, we can setup ScaleIO Volumes. This is an example in how to attach a Volume to a running VM:
Login into the OpenStack Cluster:

Review the Block storage services by navigating: Admin -> System -> System Information secction. You should see the ScaleIO Cinder Volume.

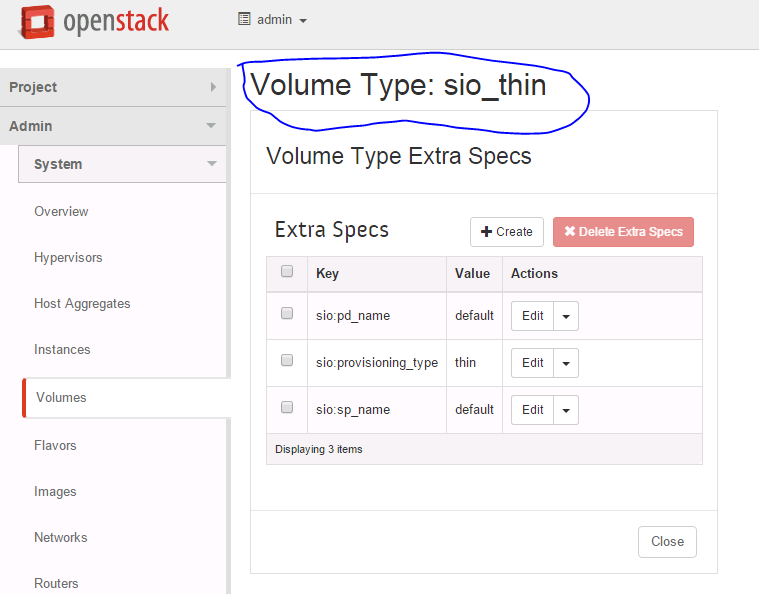
Review the System Volumes by navigating to: Admin -> System -> Volumes. You should see the ScaleIO Volume Type:
Create a new OpenStack Volume:

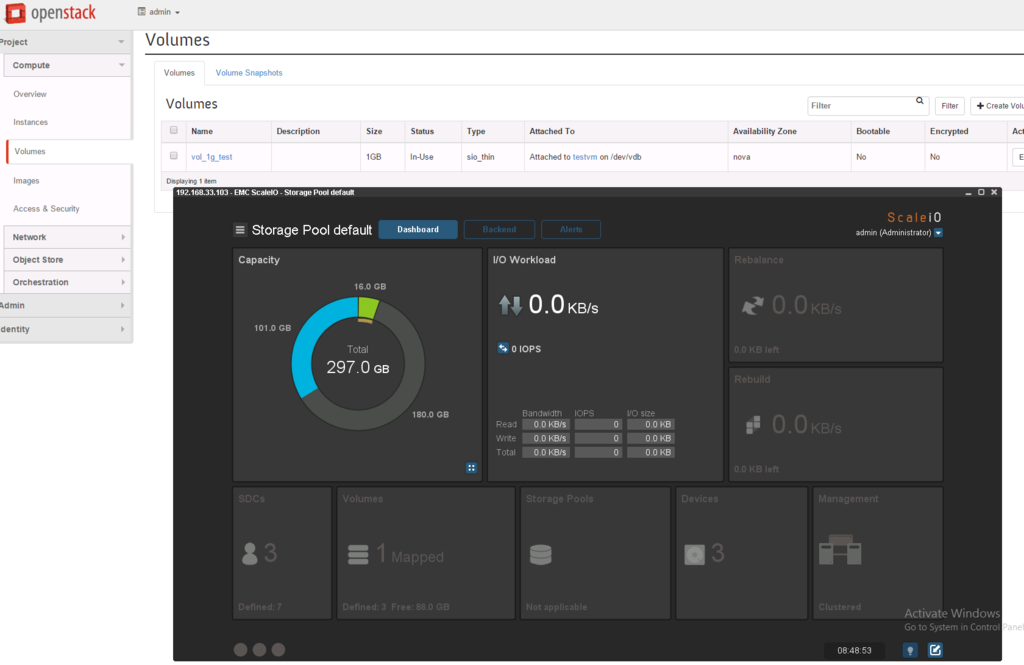
View the newly created Volume:

In the ScaleIO Control Panel, you will see that no Volumes have been mapped yet:
Once the Volume is attached to a VM, the ScaleIO UI will reflect the mapping: