19 KiB
Part 1: Creating your first Application Package
All tutorials on programming languages start with a "Hello, World" example, and since Murano provides its own programming language, this guide will start the same way. Let's do a "Hello, World" application. It will not do anything useful yet, but will provide you with an understanding of how things work in Murano. We will add more logic to the package at later stages. Now let's start with the basics:
Creating package manifest
Let's start with creating an empty Murano Package. All packages consist of multiple files (two at least) organized into a special structure. So, let's create a directory somewhere in our file system and set it as our current working directory. This directory will contain our package:
$ mkdir HelloWorld
$ cd HelloWorld
The main element of the package is its manifest. It is a description of the package,
telling Murano how to display the package in the catalog. It is defined
in a yaml file called manifest.yaml which should be placed
right in the main package directory. Let's create this file and open it
with any text editor:
$ vim manifest.yamlThis file may contain a number of sections (we will take a closer
look at some of them later), but the mandatory ones are
FullName and Type.
The FullName should be a unique identifier of the
package, the name which Murano uses to distinguish it among other
packages in the catalog. It is very important for this name to be
globally unique: if you publish your package and someone adds it to
their catalog, there should be no chances that someone else's package
has the same name. That's why it is recommended to give your packages
Full Names based on the domain you (or the company your work for) own.
We recommend using "reversed-domain-name" notation, similar to the one
used in the world of Java development: if the yourdomain.com is the domain name you own, then
you could name your package com.yourdomain.HellWorld. This
way your package name will not duplicate anybody else's, even if they
also named their package "HelloWorld", because theirs will begin with a
different domain-specific prefix.
Type may have either of two values:
Application or Library.
Application indicates the standard package to deploy an
application with Murano, while a Library is bundle of
reusable scenarios which may be used by other packages. For now we just
need a single standalone app, so let's choose an
Application type. The Description is a text
attribute, providing detailed info about your package.
Enter these values and save the file. You should have something like this:
FullName: com.yourdomain.HelloWorld
Type: Application
Description: |
    A package which demonstrates
    development for Murano
    by greeting the user.
This is the minimum required to start. We'll add more manifest data later.
Adding a class
While manifests describe Murano
packages in the catalog, the actual logic of packages is put into classes, which are plain YAML files placed into
the Classes directory of the application package. So, let's
create a directory to store the logic of our application, then create
and edit the file to contain the first class of the package.
$ mkdir Classes
$ vim Classes/HelloWorld.yaml
Murano classes follow standard patterns of object-oriented programming: they define the types of the objects which may be instantiated by Murano. The types are composed of properties, defining the data structure of objects, and methods, containing the logic that defines the way in which Murano executes the former. The types may be `extended`: the extended class contains all the methods and properties of the class it extends, or it may override some of them.
Let's type in the following YAML to create our first class:
Name: com.yourdomain.HelloWorld

Extends: io.murano.Application

Methods:
  deploy:
    Body:
      - $reporter: $this.find('io.murano.Environment').reporter
      - $reporter.report($this, "Hello, World!")
Let's walk through this code line by line and see what this code
does. The first line is pretty obvious: it states the name of our class,
com.yourdomain.HelloWorld. Note that this name matches the
name of the package - that's intentional. Although it is not mandatory,
it is strongly recommended to give the main class of your application
package the same name as the package itself.
Then, there is an Extends directive. It says that our
class extends (or inherits) another class, called
io.murano.Application. That is the base class for all
classes which should deploy Applications in Murano. As many other
classes it is shipped with Murano itself, thus its name starts with
io.murano. prefix: murano.io domain is controlled by the Murano
development team and no one else should create packages or classes
having names in that namespace.
Note that Extends directive may contain not only a
single value, but a list. In that case the class we create will inherit
multiple base classes. Yes, Murano has multiple inheritance, yay!
Now, the Methods block contains all the logic
encapsulated in our class. In this example there is just one method,
called deploy. This method is defined in the base class
we've just inherited - the io.murano.Application, so here
we override it. Body block
of the method contains the implementation, the actual logic of the
method. It's a list of instructions (note the dash-prefixed lines -
that's how YAML defines lists), each executed one by one.
There are two instruction statements here. The first one declares a
variable named $reporter
(note the $ character: all the words prefixed with it are
variables in Murano language) and assigns it a value. Unlike other
languages Murano uses colon (:) as an assignment operator:
this makes it convenient to express Murano statements as regular YAML
mappings. The expression to the right of the colon is executed and the
result value is assigned to a variable to the left of the colon.
Let's take a closer look at the right-hand side of the expression in the first statement:
- $reporter: $this.find('io.murano.Environment').reporterIt takes a value of a special variable called $this
(which always contains a reference to the current object, i.e. the
instance of our class for which the method was called; it is same as
self in python or this in Java) and calls a
method named find on it with a string parameter equal to
'io.murano.Environment'; from the call result it takes a "reporter"
attribute; this value is assigned to the variable in the left-hand side
of the expression.
The meaning of this code is simple: it finds the object of class
io.murano.Environment which owns the current application
and returns its "reporter" object. This
io.murano.Environment is a special object which groups
multiple deployed applications. When the end-user interacts with Murano
they create these Environments and place
applications into them. So, every Application is able to get a reference
to this object by calling find method like we just did.
Meanwhile, the io.murano.Environment class has various
methods to interact with the "outer world", for example to report
various messages to the end-user via the deployment log: this is done by
the "reporter" property of that class.
So, our first statement just retrieved that reporter. The second one uses it to display a message to a user: it calls a method "report", passes the reference to a reporting object and a message as the arguments of the method:
- $reporter.report($this, "Hello, World!")Note that the second statement is not a YAML-mapping: it does not have a colon inside. That's because this statement just makes a method call, it does not need to remember the result.
That's it: we've just made a class which greets the user with a
traditional "Hello, World!" message. Now we need to include this class
into the package we are creating. Although it is placed within a
Classes subdirectory of the package, it still needs to be
explicitly added to the package. To do that, add a Classes
section to your manifest.yaml file. This should be a YAML mapping,
having class names as keys and relative paths of files within the
Classes directory as the values. So, for our example class
it should look like this:
Classes:
  com.yourdomain.HelloWorld: HelloWorld.yaml
Paste this block anywhere in the manifest.yaml
Pack and upload your app
Our application is ready. It's very simplistic and lacks many features required for real-world applications, but it already can be deployed into Murano and run there. To do that we need to pack it first. We use good old zip for it. That's it: just zip everything inside your package directory into a zip archive, and you'll get a ready-to-use Murano package:
$ zip -r hello_world.zip *This will add all the contents of our package directory to a zip
archive called hello_world.zip. Do not forget the
-r argument to include the files in subdirectories (the
class file in our case).
Now, let's upload the package to murano. Ensure that your system has a murano-client installed and your OpenStack cloud credentials are exported as environmnet variables (if not, sourcing an openrc file, downloadable from your horizon dashboard will do the latter). Then execute the following command:
$ murano package-import ./hello_world.zip
Importing package com.yourdomain.HelloWorld
+----------------------------------+---------------------------+---------------------------+-----------+--------+-----------+-------------+---------+
| ID                               | Name                      | FQN                       | Author    | Active | Is Public | Type        | Version |
+----------------------------------+---------------------------+---------------------------+-----------+--------+-----------+-------------+---------+
| 251a409645d1444aa1ead8eaac451a1d | com.yourdomain.HelloWorld | com.yourdomain.HelloWorld | OpenStack | True   |           | Application |         |
+----------------------------------+---------------------------+---------------------------+-----------+--------+-----------+-------------+---------+
As you can see from the output, the package has been uploaded to Murano catalog and is now available there. Let's now deploy it.
Deploying your application
To deploy an application with Murano one needs to create an Environment and add configured instances of your applications into it. It may be done either with the help of user interface (but that requires some extra effort from package developer) or by providing an explicit JSON, describing the exact application instance and its configuration. Let's do the latter option for now.
First, let's create a json snippet for our application. Since the app is very basic, the snippet is simple as well:
[
   {
     "op": "add",
     "path": "/-",
     "value": {
       "?": {
         "name": "Demo",
         "type": "com.yourdomain.HelloWorld",
         "id": "42"
        }
     }
   }
 ]
This json follows a standard json-patch notation, i.e. it defines a
number of operations to edit a large json document. This particular one
adds (note the value of op
key) an object described in the value of the json to the
root (note the path equal to
/- - that's root) of our environment. The object we add has
the type of
com.yourdomain.HelloWorld - that's the class we just
created two steps ago. Other keys in this json parameterize the object
we create: they add a name and an id to the object. Id is mandatory, name is
optional. Note that since the id, name and type are the system properties of our object, they are
defined in a special section of the json -the so-called ?-header. Non-system properties, if they
existed, would be defined at a top-level of the object. We'll add them
in a next chapter to see how they work.
For now, save this JSON to some local file (say,
input.json) and let's finally deploy the thing.
Execute the following sequence of commands:
$ murano environment-create TestHello
+----------------------------------+-----------+--------+---------------------+---------------------+
| ID                               | Name      | Status | Created             | Updated             |
+----------------------------------+-----------+--------+---------------------+---------------------+
| 34bf673a26a8439d906827dea328c99c | TestHello | ready  | 2016-10-04T13:19:12 | 2016-10-04T13:19:12 |
+----------------------------------+-----------+--------+---------------------+---------------------+

$ murano environment-session-create 34bf673a26a8439d906827dea328c99c
Created new session:
+----------+----------------------------------+
| Property | Value                            |
+----------+----------------------------------+
| id       | 6d4a8fa2a5f4484fbc07740ef3ab60dd |
+----------+----------------------------------+

$ murano environment-apps-edit --session-id 6d4a8fa2a5f4484fbc07740ef3ab60dd 34bf673a26a8439d906827dea328c99c ./input.json
This first command creates a murano environment named
TestHello. Note the id of
the created environment - we use it to reference it in subsequent
operations.
The second command creates a "configuration session" for this environment. Configuration sessions allow one to edit environments in transactional isolated manner. Note the id of the created sessions: all subsequent calls to modify or deploy the environment use both ids of environment and session.
The third command applies the json-patch we've created before to our environment within the configuration session we created.
Now, let's deploy the changes we made:
$ murano environment-deploy --session-id 6d4a8fa2a5f4484fbc07740ef3ab60dd 34bf673a26a8439d906827dea328c99c
+------------------+---------------------------------------------+
| Property         | Value                                       |
+------------------+---------------------------------------------+
| acquired_by      | 7b0fe7c67ede443da9840adb2d518d5c            |
| created          | 2016-10-04T13:39:34                         |
| description_text |                                             |
| id               | 34bf673a26a8439d906827dea328c99c            |
| name             | TestHello                                   |
| services         | [                                           |
|                  |   {                                         |
|                  |     "?": {                                  |
|                  |       "name": "Demo",                       |
|                  |       "status": "deploying",                |
|                  |       "type": "com.yourdomain.HelloWorld",  |
|                  |       "id": "42"                            |
|                  |     }                                       |
|                  |   }                                         |
|                  | ]                                           |
| status           | deploying                                   |
| tenant_id        | 60b7b5f7d4e64ff0b1c5f047d694d7ca            |
| updated          | 2016-10-04T13:39:34                         |
| version          | 0                                           |
+------------------+---------------------------------------------+
This will deploy the environment. You may check for its status by executing the following command:
$ murano environment-show 34bf673a26a8439d906827dea328c99c
+------------------+-----------------------------------------------------------------------------+
| Property         | Value                                                                       |
+------------------+-----------------------------------------------------------------------------+
| acquired_by      | None                                                                        |
| created          | 2016-10-04T13:39:34                                                         |
| description_text |                                                                             |
| id               | 34bf673a26a8439d906827dea328c99c                                            |
| name             | TestHello                                                                   |
| services         | [                                                                           |
|                  |   {                                                                         |
|                  |     "?": {                                                                  |
|                  |       "status": "ready",                                                    |
|                  |       "name": "Demo",                                                       |
|                  |       "type": "com.yourdomain.HelloWorld/0.0.0@com.yourdomain.HelloWorld",  |
|                  |       "_actions": {},                                                       |
|                  |       "id": "42",                                                           |
|                  |       "metadata": null                                                      |
|                  |     }                                                                       |
|                  |   }                                                                         |
|                  | ]                                                                           |
| status           | ready                                                                       |
| tenant_id        | 60b7b5f7d4e64ff0b1c5f047d694d7ca                                            |
| updated          | 2016-10-04T13:40:29                                                         |
| version          | 1                                                                           |
+------------------+-----------------------------------------------------------------------------+
As you can see, the status of the Environment has changed to
ready: it means that the application has been deployed.
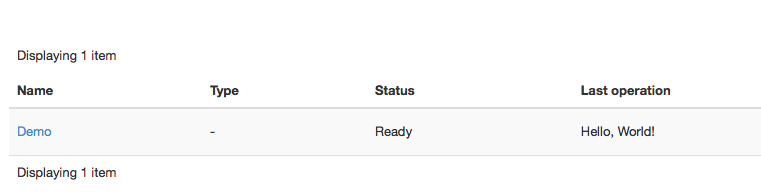
Open Murano Dashboard, navigate to Environment list and browse the
contents of the TestHello environment there. You'll see
that the 'Last Operation' column near the "Demo" component says "Hello,
World!" - that's the reporting made by our application:
This concludes the first part of our course. We've created a Murano Application Package, added a manifest describing its contents, written a class which reports a "Hello, World" message, packed all of these into a package archive and uploaded it to Murano Catalog and finally deployed an Environment with this application added.
In the next part we will learn how to improve this application in various aspects, both from users' and developers' perspectives.