4.7 KiB
User Guide
Once the Fuel ScaleIO plugin has been installed (following the Installation Guide <installation>), you can
create an OpenStack environments that uses ScaleIO as the block
storage backend.
Prepare infrastructure
At least 5 nodes are required to successfully deploy Mirantis OpenStack with ScaleIO.
- Fuel master node (w/ 50GB Disk, 2 Network interfaces [Mgmt, PXE] )
- OpenStack Controller #1 node
- OpenStack Controller #2 node
- OpenStack Controller #3 node
- OpenStack Compute node
Each node shall have at least 2 CPUs, 4GB RAM, 200GB disk, 4 Network interfaces. The 4 networks are:
- PXE Network
- Public Network
- Private Network
- Management Network
Controllers 1, 2, and 3 will be used as ScaleIO MDMs, being the primary, secondary, and tie-breaker, respectively. Moreover, they will also host the ScaleIO Gateway in HA mode.
All nodes are used as ScaleIO SDS and, therefore, contribute to the default storage pool.
Install ScaleIO GUI
It is recommended to install the ScaleIO GUI to easily access and manage the ScaleIO cluster.
Make sure the machine in which you will install the ScaleIO GUI has access to the Controller nodes.
Download the ScaleIO for your operating system from the following link: http://www.emc.com/products-solutions/trial-software-download/scaleio.htm
Unzip the file and install the ScaleIO GUI component.
Once installed, run the application and you will be prompted with the following login window. We will use it once the deployment is completed.

Select Environment
Create a new environment with the Fuel UI wizard. Select "Juno on CentOS 6.5" from OpenStack Release dropdown list and continue until you finish with the wizard.

Add VMs to the new environment according to Fuel User Guide and configure them properly.
Plugin configuration
Go to the Settings tab and scroll down to "ScaleIO plugin" section. You need to fill all fields with your preferred ScaleIO configuration. If you do not know the purpose of a field you can leave it with its default value.

Take the time to review and configure other environment settings such as the DNS and NTP servers, URLs for the repositories, etc.
Finish environment configuration
Go to the Network tab and configure the network according to your environment.
Run network verification check

Press Deploy button once you have finished reviewing the environment configuration.

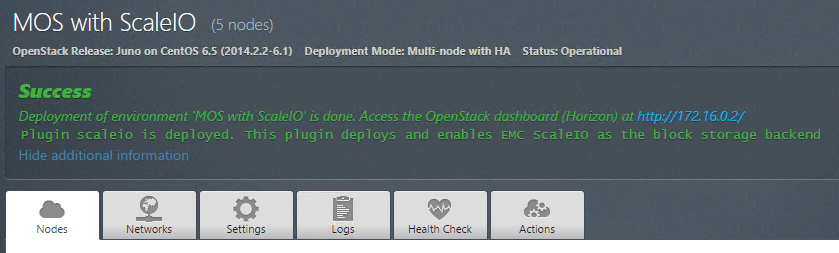
After deployment is done, you will see a message indicating the result of the deployment.
ScaleIO verification
Once the OpenStack cluster is setup, we can make use of ScaleIO volumes. This is an example about how to attach a volume to a running VM.
Login into the OpenStack cluster:
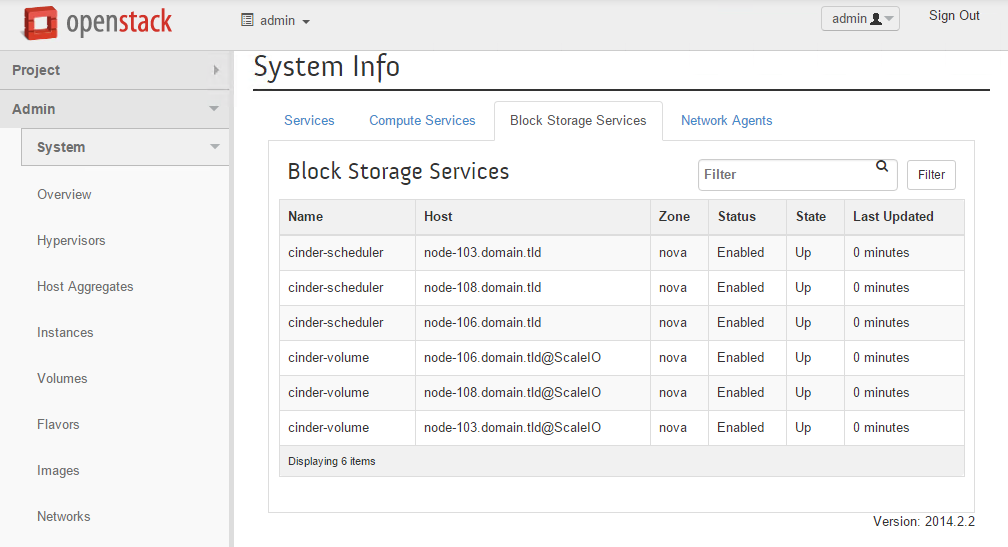
Review the block storage services by navigating to the "Admin -> System -> System Information" section. You should see the "@ScaleIO" appended to all cinder-volume hosts.
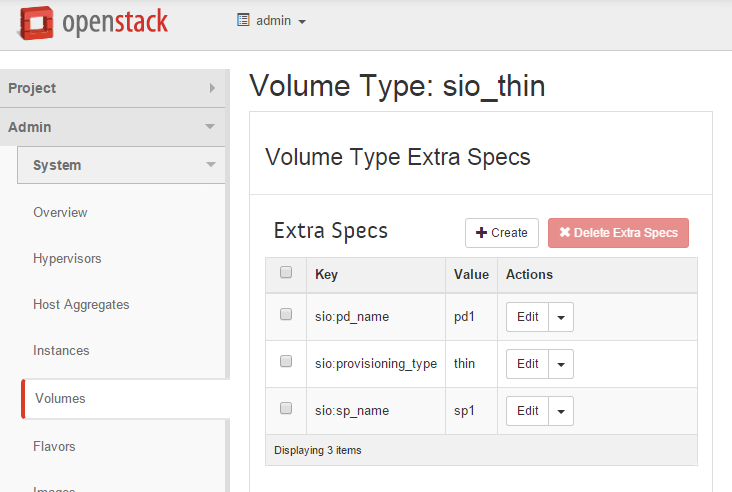
Review the System Volumes by navigating to "Admin -> System -> Volumes". You should see a volume type called "sio_thin" with the following extra specs.
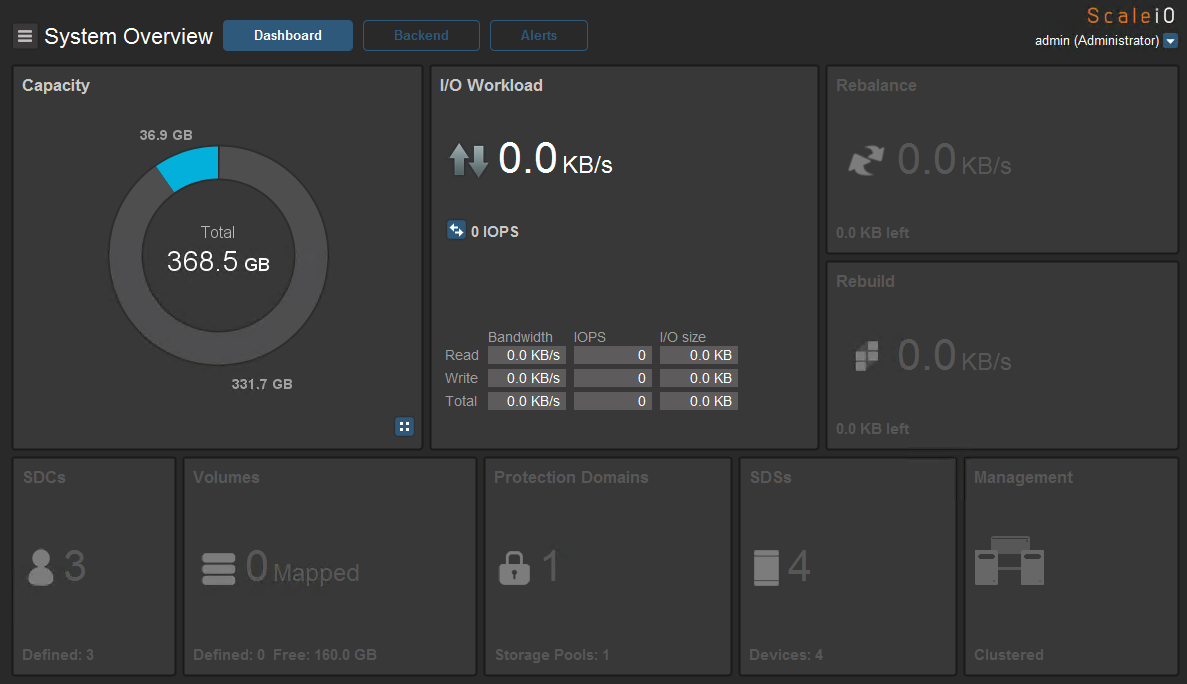
In the ScaleIO GUI (see
Install ScaleIO GUI section <scaleiogui>), enter the IP address of the primary controller node, username admin, and the password you entered in the Fuel UI.Once logged in, verify that it successfully reflects the ScaleIO resources:
Click on the "Backend" tab and verify all SDS nodes:

Create a new OpenStack volume using the "sio_thin" volume type.
In the ScaleIO GUI, you will see that there is one volume defined but none have been mapped yet.

Once the volume is attached to a VM, the ScaleIO GUI will reflect the mapping.
