3.0 KiB
User Guide
Once the Kafka Plugin is installed following the
instructions of the Installation Guide, you can add Kafka nodes to new or
existing Mirantis OpenStack (MOS) environment.
Plugin Configuration
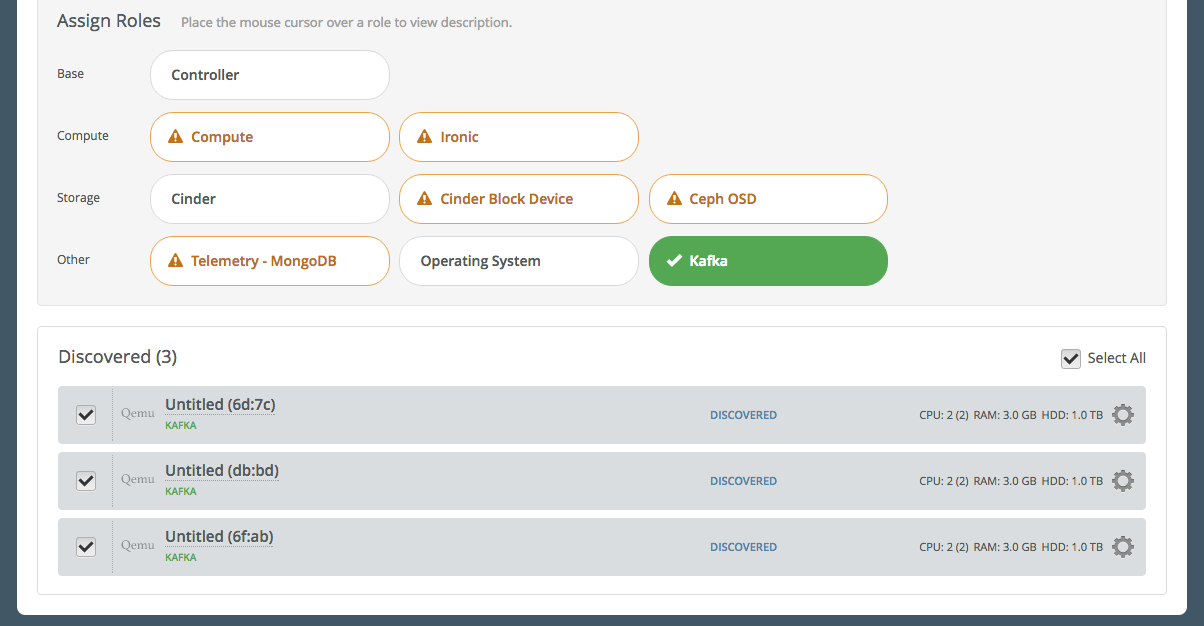
To use the Kafka Plugin, you need to add nodes with Kafka role Add a node to an OpenStack environment.
Make sure that the plugin is properly installed on the Fuel Master node.
Go to the Plugins tab. You should see the following:

Enable the plugin. You can configure additional setting on this step.
Go to the Environments tab and select the The Apache Kafka Message Broker Plugin checkbox:

Add nodes to your environment and assign the Kafka role.
Note
When adding nodes to the environment and assign or change a role, do not forget to use an odd number of nodes as recommended in
overviewsection.
- Verify your network configuration.
- Deploy your changes once you are done with the configuration of your environment.
Plugin Verification
On the Fuel Master node, find the IP address of a node where the Kafka is installed using the
fuel nodescommand:[root@fuel ~]# fuel nodes id|status|name |cluster|ip |mac |roles | --|------|----------------|-------|----|-------------------------| 1 |ready |Untitled (fa:87)| 1 |... |... |kafka | 2 |ready |Untitled (12:aa)| 1 |... |... |kafka | 3 |ready |Untitled (4e:6e)| 1 |... |... |kafka |Log in to any of these nodes using SSH, for example, to
node-1.Run the following command:
root@node-1:~# netstat -ntpl | grep java
tcp6       0      0 :::9092                 :::*                    LISTEN      14702/java
tcp6       0      0 :::2181                 :::*                    LISTEN      9710/java
tcp6       0      0 :::9990                 :::*                    LISTEN      14702/java
You will see that Kafka and Zookeeper are running and listening theirs ports: 2181 - Zookeeper, 9092 and 9990 - Kafka.
Additionally you can test sending/receiving messages with instructions on Quick Start Guide (Step 3 - Step 5)